Thursday, April 17, 2025

Detailed Plans for Constructing a Decorative Wishing Well

This document provides comprehensive instructions for crafting a decorative wishing well, suitable for garden or patio placement. The design prioritizes aesthetic appeal while maintaining practicality and structural integrity. The plans assume a moderate level of woodworking skill and access to standard woodworking tools. Detailed dimensions are provided, but adjustments can be made to suit individual preferences and available materials.

I. Materials and Tools

Before commencing construction, ensure you have gathered all necessary materials and tools. A complete inventory will streamline the process and minimize interruptions.

A. Lumber Selection and Quantities:

The choice of wood significantly impacts the aesthetic and longevity of the wishing well. Cedar or redwood are excellent choices due to their natural resistance to rot and decay. Pressure-treated lumber offers a more budget-friendly alternative but requires proper sealing to prevent premature weathering.

  • Posts (4): 4" x 4" x 8' (adjust height as needed)
  • Sides (4): 1" x 6" x 8' (length determined by desired well diameter)
  • Roof Supports (4): 2" x 4" x 6' (length will depend on roof overhang)
  • Roof Planks: 1" x 6" or 1" x 8" (quantity based on roof design)
  • Base Boards: 1" x 6" or 1" x 8" (quantity based on base design)
  • Bucket Support (optional): 1" x 4" or 2" x 4"
  • Trim Boards (various): For decorative accents and finishing

B. Hardware and Fasteners:

  • Exterior-grade wood screws: Various lengths (1 ½", 2", 2 ½", 3")
  • Wood glue:
  • Exterior-grade wood stain or paint:
  • Metal roofing or shingles (optional): For added weather protection
  • Metal bucket or container (optional): To serve as the wishing well receptacle
  • Decorative hardware (optional): Hinges, latches, and other embellishments

C. Required Tools:

  • Measuring tape and pencil:
  • Circular saw or hand saw:
  • Drill with assorted drill bits:
  • Screwdriver (impact driver recommended):
  • Level:
  • Safety glasses and hearing protection:
  • Clamps:
  • Sandpaper (various grits):
  • Paintbrushes or rollers:

II. Construction Process

The construction process is divided into distinct stages to ensure efficient and accurate assembly.

A. Base Construction:

The base provides stability and enhances the overall aesthetic. Consider constructing a square or octagonal base depending on your design preference. Cut the base boards to the desired length and assemble them using wood glue and screws, ensuring squareness and stability.

B. Post Assembly and Erection:

The posts form the vertical structure of the well. Cut the posts to the desired height, ensuring they are perfectly plumb. Attach the posts securely to the base using screws and wood glue. Consider using metal brackets for added reinforcement.

C. Side Panel Construction and Attachment:

Cut the side panels to the appropriate length, ensuring they are precisely measured to fit snugly between the posts. Use wood glue and screws to attach the panels to the posts, creating a well-defined cylindrical or polygonal shape. Ensure proper alignment and even spacing throughout the construction process.

D. Roof Frame Construction:

Construct the roof frame using the 2" x 4" lumber. Cut and assemble the support beams according to your design, allowing for a suitable overhang. Ensure the roof frame is square and level before proceeding to the next stage.

E. Roofing Installation:

Apply the chosen roofing material (wood planks, metal roofing, or shingles) to the roof frame. Secure the roofing material with appropriate fasteners, ensuring watertight sealing. Consider using flashing to prevent water leakage around the edges.

F. Bucket Support (Optional):

If incorporating a metal bucket as a wishing well receptacle, construct a simple support structure within the well to hold the bucket securely. Ensure the bucket is easily accessible for clearing.

G. Finishing and Decoration:

Once the structural assembly is complete, sand all surfaces smooth. Apply the chosen stain or paint, allowing for adequate drying time between coats. Add decorative trim boards, hinges, latches, or other embellishments as desired. Consider adding a small opening near the top for retrieving wishes.

III. Safety Precautions

Safety should be a paramount concern throughout the woodworking process. Always wear appropriate safety gear, including safety glasses and hearing protection. Use caution when operating power tools, following manufacturer's instructions carefully. Ensure the work area is well-lit and free from obstructions. Proper handling of wood and fasteners is crucial to prevent injuries.

IV. Customization and Variations

This design can be customized to suit various preferences and aesthetic goals. The size, shape, and materials can be adjusted as needed. Consider adding decorative elements such as carvings, inlays, or paint schemes to enhance the visual appeal. The roof style can also be modified to create a more rustic or formal appearance. Experimentation and creativity are encouraged.

V. Conclusion

Constructing a decorative wishing well is a rewarding woodworking project that combines craftsmanship with aesthetic expression. By carefully following these detailed plans and adhering to safety precautions, you can create a beautiful and functional addition to your outdoor space. Remember that attention to detail throughout the process will result in a finished product of superior quality and lasting appeal. Enjoy the process and the satisfaction of creating something unique and lasting.

Craft a Cozy Corner: Building Your Country-Style Bench

Yearning for a charming, rustic addition to your porch, garden, or even living room? A country-style bench offers both practical seating and undeniable aesthetic appeal. This guide walks you through building your own, providing detailed plans and empowering you to create a piece that perfectly reflects your personal style. Forget generic store-bought furniture; build something uniquely yours, imbued with the warmth of handcrafted quality.

Choosing Your Materials: The Heart of Your Bench

Selecting the right lumber forms the foundation of your project. Pressure-treated pine or cedar are excellent choices for outdoor benches, boasting durability and resistance to the elements. For indoor use, opt for red oak, maple, or cherry for their beauty and strength. Aim for lumber that's kiln-dried to minimize warping and shrinkage. Consider the overall aesthetic: rough-hewn lumber offers a more rustic feel, while smoother boards create a refined look. Don't forget your fasteners! Choose high-quality exterior-grade screws or galvanized bolts for lasting strength. You'll also need wood glue for strong joints.

Detailed Construction Plans: Step-by-Step Guide

Building the Bench Legs

Begin by cutting four legs to your desired height. Typically, bench legs range from 16 to 18 inches tall. For added stability, consider creating slightly splayed legs, angling them outwards slightly at the base. Securely attach these legs to the bottom of the seat supports using wood glue and screws, ensuring squareness at every corner. Use a combination square to check for perfect 90-degree angles; accuracy here translates to a stable and visually pleasing bench.

Constructing the Seat Supports

Next, construct the seat supports. These are typically two long pieces of lumber running the length of the bench, creating a frame upon which the seat boards rest. Cut these pieces to the desired length, making sure they're precisely the same size. Attach the seat supports to the top of the legs, again using wood glue and screws for a strong and reliable joint. Reinforce this connection with additional screws angled for maximum strength, preventing racking over time.

Assembling the Seat

Now, it's time to add the seat boards. Cut your chosen lumber to the correct length, allowing for a slight gap between each board for expansion and contraction. Arrange the boards evenly across the seat supports, ensuring they are tightly spaced yet not overly compressed. Secure the seat boards to the supports with screws, countersinking them slightly for a clean finish. Consider pre-drilling pilot holes to prevent the wood from splitting.

Adding Finishing Touches

Once the bench is assembled, sand all surfaces smooth, paying special attention to the edges and corners. Apply a suitable finish to protect the wood and enhance its appearance. Exterior-grade stains or sealants are perfect for outdoor benches, while interior-grade paints or varnishes are ideal for indoor use. Allow the finish ample time to dry completely before using the bench.

Optional Enhancements: Personalizing Your Creation

Let your creativity shine! Consider these optional additions to truly personalize your country-style bench:

  • Add a backrest: Cut and attach vertical supports to the back of the seat supports, then add horizontal slats for a comfortable backrest.
  • Incorporate decorative elements: Use contrasting wood species for accents, add carved details, or incorporate wrought iron hardware for a more ornate look.
  • Add armrests: For extra comfort, construct armrests from sturdy lumber, attaching them securely to the seat supports.

Building your own country-style bench is a rewarding experience. Follow these plans carefully, take your time, and enjoy the process of creating a beautiful and functional piece that you'll cherish for years to come.

Tuesday, February 4, 2025

Free Simple Woodworking Projects for Beginners and Experts

Hey there, fellow woodworkers! Whether you're just picking up a saw for the first time or you're a seasoned pro looking for a fun weekend project, I've got you covered. This guide is packed with woodworking project ideas, ranging from super simple for beginners to slightly more challenging projects for those with a bit more experience. Let's dive in!

Beginner-Friendly Woodworking Projects

Starting with woodworking can feel a little daunting, but trust me, it's incredibly rewarding. These projects are designed to build your confidence and introduce you to basic woodworking techniques without breaking the bank or requiring a massive workshop.

The Classic Coasters

This is the perfect starter project! All you need are some square pieces of wood (about 4 inches by 4 inches), sandpaper, wood stain or paint (optional), and a finish like polyurethane. Sand the wood smooth, apply your chosen finish, and voila! You've got functional and stylish coasters. You can get creative with designs too – maybe burn some simple designs into them or add some mosaic tiles for extra flair.

A Simple Shelf

A small, floating shelf is a great way to practice using a saw and measuring accurately. You'll need two shelf boards and some L-brackets to mount them to the wall. Measure twice, cut once (seriously, this is important!), and you'll have a shelf perfect for displaying your favorite books, plants, or knick-knacks. Remember to pre-drill holes for the screws to prevent the wood from splitting.

A Wooden Box

Making a simple wooden box is a fantastic way to learn about joining techniques. You can use a simple rabbet joint (which is easier than it sounds!) or even just glue and screws. Choose a nice piece of wood, cut your pieces, assemble it, and you have a cute little box perfect for storing anything from jewelry to small tools. Consider adding a simple lid for an extra challenge.

Keychain

A small keychain is a quick and easy project that's perfect for learning about shaping and finishing wood. You can cut out a simple shape from a scrap piece of wood, sand it smooth, and then add a key ring. You can even personalize it by adding some engraving or a simple design.

Intermediate Woodworking Projects

Once you've mastered the basics, you can move on to projects that require a bit more skill and precision. These projects will introduce you to more advanced techniques and allow you to create more complex pieces.

A Birdhouse

Building a birdhouse is a classic woodworking project. It requires careful measuring and cutting, and you'll get to practice using different joinery techniques. You can find tons of free plans online, so you can choose a design that matches your skill level and aesthetic preferences. Remember to use weather-resistant wood and finish to ensure your feathered friends have a cozy home.

A Small Table

A small side table or end table is a great way to put your skills to the test. You'll need to use more advanced joinery techniques (like mortise and tenon joints or dowel joints), and you'll need to plan your project carefully. Choose a simple design to start with, and don't be afraid to ask for help if you get stuck.

A Picture Frame

Making a picture frame is a great way to practice your miter cuts and learn about assembling a frame. You can use simple miter joints and glue, or you can use more advanced techniques like biscuits or splines. This is a perfect project to showcase your creativity – choose different types of wood, add decorative molding, or even inlay some interesting materials.

Advanced Woodworking Projects

These projects are for those who have a solid understanding of woodworking techniques and are looking for a challenge. They might require specialized tools and a significant time commitment.

A Rocking Chair

A rocking chair is a classic woodworking project that will test your skills and patience. You'll need to be comfortable with complex curves, joinery, and finishing. This is a project to really show off your woodworking expertise.

A Wooden Chest

A beautifully crafted wooden chest is a fantastic project for experienced woodworkers. This will involve advanced joinery techniques, potentially some intricate carving, and a high level of finish work. This project allows for significant personalization and can become a true heirloom piece.

Tips for Success

  • Start small: Don't try to tackle a complex project right away. Start with something simple to build your confidence and skills.
  • Read the plans carefully: Before you start cutting, make sure you understand the plans completely.
  • Measure twice, cut once: This is the golden rule of woodworking. Accurate measurements are essential for a successful project.
  • Use the right tools: Invest in good quality tools, and learn how to use them properly.
  • Take your time: Woodworking is a process, and rushing will only lead to mistakes. Enjoy the process!
  • Don't be afraid to ask for help: If you get stuck, don't hesitate to ask for help from experienced woodworkers.

Commonly Asked Questions

Q: What kind of wood should I use for my first project?

A: Pine is a great choice for beginners. It's relatively inexpensive, easy to work with, and readily available.

Q: What tools do I need to get started?

A: For basic projects, you'll need a measuring tape, a pencil, a saw (hand saw or circular saw), sandpaper, and clamps. As you progress, you might want to invest in a drill, chisels, and other hand tools.

Q: Where can I find free woodworking plans?

A: There are tons of free woodworking plans available online. Try searching on sites like Pinterest, Instructables, and Ana White.

Q: What safety precautions should I take?

A: Always wear safety glasses, and consider a dust mask, especially when sanding or using power tools. Make sure your work area is well-lit and organized. Learn how to use your tools safely before you start any project.

Happy woodworking! I hope this guide inspires you to get started on your next project. Remember to share your creations with me – I'd love to see what you make!

Woodworking Projects for Beginners: Step-by-Step Guides

Embarking on the journey of woodworking can be both rewarding and challenging. The inherent satisfaction derived from crafting functional and aesthetically pleasing objects from raw materials is unparalleled. This comprehensive guide offers detailed, step-by-step instructions for several beginner-friendly woodworking projects, designed to equip aspiring woodworkers with the foundational skills and knowledge necessary to succeed.

Project 1: Simple Wooden Coasters

This project is ideal for absolute beginners, requiring minimal tools and skills. The focus is on developing precision cutting techniques and understanding the importance of sanding for a smooth finish.

Materials Required:

  • Four 4" x 4" pieces of hardwood (e.g., maple, cherry, or oak)
  • Sandpaper (various grits: 100, 150, 220)
  • Wood glue
  • Wood finish (e.g., polyurethane, varnish, or oil)
  • Measuring tape or ruler
  • Pencil
  • Hand saw or jigsaw
  • Clamps
  • Cloth rags

Step-by-Step Instructions:

  1. Measure and Cut: Using a ruler and pencil, carefully mark the desired dimensions (e.g., 3.5" x 3.5") on each piece of wood. Employ a hand saw or jigsaw to cut along the marked lines, ensuring straight, clean cuts. Practice slow, controlled movements to avoid splintering.
  2. Sanding: Begin sanding with 100-grit sandpaper to remove any rough edges or imperfections. Gradually progress to 150-grit and then 220-grit sandpaper for a progressively smoother finish. Sand with the grain of the wood to avoid scratches. Pay particular attention to the edges.
  3. Optional: Applying a Design: At this stage, you may choose to add a simple design using wood burning tools or paint, if desired. Ensure the design is applied before applying any finish.
  4. Finishing: Apply a thin, even coat of your chosen wood finish according to the manufacturer's instructions. Allow ample drying time before applying subsequent coats (if necessary). Multiple thin coats are preferable to one thick coat, which may run or drip.
  5. Assembly (Optional): If you prefer thicker coasters, you may glue two pieces together using wood glue and clamps. Ensure even pressure during drying.

Project 2: Basic Wooden Shelf

This project introduces the concept of assembling multiple pieces of wood to create a functional structure. It emphasizes accurate measurements, precise cutting, and the proper use of screws and wood glue.

Materials Required:

  • Three 1" x 6" x 12" pine boards
  • Wood screws (1 ½" and 2")
  • Wood glue
  • Drill with drill bits (slightly smaller than the screw diameter)
  • Level
  • Measuring tape or ruler
  • Pencil
  • Screwdriver
  • Sandpaper
  • Wood finish (optional)

Step-by-Step Instructions:

  1. Prepare the Boards: Sand all boards thoroughly to ensure a smooth surface. This step is crucial for both aesthetics and to prevent splinters.
  2. Assemble the Shelf: Two boards will serve as the shelf supports, and one will be the shelf itself. Position the supports vertically, approximately 10 inches apart. Use wood glue and 1 ½" screws to attach the shelf board to the supports. Pre-drill pilot holes to prevent the wood from splitting.
  3. Check for Level: Use a level to ensure the shelf is perfectly horizontal before the glue sets. This ensures stability and a professional finish.
  4. Optional: Mounting Brackets: Consider using L-brackets (metal or wooden) for extra strength and stability, especially if the shelf will carry heavier items. These should be screwed into both the wall and the shelf.
  5. Finishing: After the glue has dried completely, you may choose to apply a wood finish to enhance the appearance and protect the wood from moisture and damage.

Project 3: Simple Wooden Box

This project challenges the beginner woodworker to create a three-dimensional structure, incorporating miter cuts and joinery techniques. It introduces the importance of precise measurements and the use of appropriate joinery for strength and stability.

Materials Required:

  • Six pieces of wood (dimensions will depend on the desired size of the box. Consider using ½" thick wood for this project)
  • Wood glue
  • Clamps
  • Miter saw or hand saw
  • Sandpaper
  • Wood finish (optional)

Step-by-Step Instructions:

  1. Cut the Wood: Cut the wood into the necessary pieces for the box sides, top, and bottom. Use a miter saw or hand saw to accurately cut the sides at 45-degree angles for a neat miter joint. Ensure all cuts are precise and even.
  2. Assemble the Box: Apply wood glue to the edges of each piece and carefully assemble the box, ensuring the miter joints fit snugly. Use clamps to hold the pieces together firmly while the glue dries.
  3. Sanding: Once the glue is dry, sand any rough edges or imperfections. Pay close attention to the miter joints, ensuring they are smooth and flush.
  4. Finishing: Apply a wood finish (optional) to protect the box and enhance its appearance. This step adds to the longevity and aesthetics of the final project.

These three projects offer a solid foundation in basic woodworking techniques. Remember to prioritize safety by always wearing appropriate safety glasses and using caution when operating power tools. With practice and patience, you will develop the skills and confidence to tackle more complex woodworking projects in the future.

Unlock Your Inner Craftsman: Free Woodworking Projects with Simple Plans

The satisfying scent of freshly cut wood, the rhythmic whir of a saw, the pride in crafting something with your own two hands – these are the joys of woodworking. But the intimidating prospect of complex plans and expensive materials often keeps aspiring woodworkers from starting. Fear not! This article provides you with access to fantastic free woodworking projects, complete with clear and simple plans, perfectly suited for beginners and seasoned hobbyists alike. We'll guide you through the process, ensuring you can transform raw lumber into stunning, functional pieces.

Beginner-Friendly Projects: Easy Wins for Newbies

Jumping into woodworking doesn't require years of experience or a fully equipped workshop. Start with these straightforward projects that build confidence and fundamental skills. These projects use readily available materials and require minimal tools, making them perfect for your first foray into the world of woodworking.

Simple Wooden Coasters

Craft charming coasters that protect your furniture and add a personal touch to your home. These projects typically involve cutting square pieces of wood to your desired size, sanding them smooth, and applying a protective finish. You can find free plans online that guide you through each step, from choosing the right wood to applying a stain or varnish. Consider experimenting with different wood types and finishes to create unique sets!

A Rustic Shelf

Build a small, rustic shelf for your living room, bathroom, or even a child's room. This project teaches you about measuring, cutting, and assembling wood pieces. Many free plans utilize simple joinery techniques, like using wood glue and screws, rather than more complex methods. Personalize your shelf with different stains or by adding decorative elements.

Intermediate Projects: Stepping Up Your Woodworking Game

Once you've mastered the basics, you can tackle slightly more ambitious projects. These require a little more precision and planning, but the results are well worth the extra effort. These intermediate projects are ideal for building your skills and expanding your woodworking repertoire.

A Birdhouse

Construct a charming birdhouse to attract feathered friends to your garden. This project involves more intricate cuts and potentially the use of a jigsaw, but it's a fantastic way to practice your woodworking precision. Many free plans offer different designs, from simple box-style birdhouses to more elaborate models with multiple compartments. Remember to research the best birdhouse dimensions for the types of birds in your area.

A Small Wooden Toy Box

Create a sturdy and beautiful toy box for a child (or even yourself!). This project typically involves more complex joinery techniques, perhaps requiring dadoes or rabbets. This is an opportunity to practice your measurements and assembly skills. Free plans often offer variations, allowing you to adjust the size and design to match your needs and aesthetic preferences.

Where to Find Free Woodworking Plans

The internet is a treasure trove of free woodworking plans! Here are some reliable sources to explore:

  • Woodworking blogs and websites: Many woodworking enthusiasts share their projects and plans online.
  • YouTube channels: Many channels offer video tutorials that guide you through each step of the process.
  • Online woodworking forums: Connect with other woodworkers and discover new plans and techniques.

Remember to always prioritize safety when working with woodworking tools. Wear appropriate safety gear, such as safety glasses and dust masks. Take your time, and enjoy the process of creating something beautiful and functional with your own hands. Happy woodworking!

Fun Woodworking Projects for Creative Minds and DIY Lovers

Woodworking, a craft steeped in history and tradition, offers a uniquely satisfying blend of creativity, problem-solving, and tangible results. For those with a penchant for crafting and a desire to bring their visions to life, the possibilities are nearly limitless. This exploration delves into a variety of woodworking projects, suitable for both novice and experienced enthusiasts, designed to ignite the imagination and inspire countless hours of enjoyable creation.

Beginner-Friendly Projects: Building Confidence and Skill

Embarking on a woodworking journey requires a foundational understanding of basic techniques and tools. These introductory projects are designed to build confidence and familiarity, providing a solid base for more advanced endeavors.

Simple Wooden Coasters

Objective: Crafting a set of attractive and functional coasters. This project introduces basic cutting, sanding, and finishing techniques.

Materials: Small pieces of hardwood (e.g., maple, cherry), sandpaper (various grits), wood finish (e.g., polyurethane), felt pads.

Process: Cut the wood into squares or circles using a saw. Sand the pieces to a smooth finish, paying attention to the edges. Apply the wood finish according to the manufacturer's instructions, allowing ample drying time. Finally, adhere felt pads to the bottom to protect surfaces.

A Rustic Wooden Shelf

Objective: Constructing a small, functional shelf ideal for displaying small items or adding organizational space. This project enhances skills in measuring, cutting, and assembling wood.

Materials: Wooden boards (pine or similar), wood screws, wood glue, sandpaper, wood stain (optional).

Process: Cut the boards to the desired length and width for the shelf and supports. Use wood glue and screws to securely attach the shelf to the supports. Sand the finished shelf and apply a stain if desired. This project introduces the use of fasteners and the importance of precise measurements.

Engraved Wooden Keychains

Objective: Creating personalized keychains using wood engraving techniques. This project introduces the use of specialized tools and allows for creative expression.

Materials: Small pieces of hardwood, rotary tool with engraving bits, key rings, wood finish (optional).

Process: Cut the wood into desired shapes. Use the rotary tool with engraving bits to carefully etch designs or personal messages onto the surface. Apply a wood finish for protection and added aesthetic appeal. Attach key rings for completion.

Intermediate Woodworking Projects: Expanding Creative Horizons

Once fundamental skills are mastered, intermediate projects allow for greater exploration of design and technique. These projects challenge the woodworker to integrate multiple skills and explore more complex joinery.

Building a Simple Birdhouse

Objective: Constructing a functional and aesthetically pleasing birdhouse. This project combines cutting, joining, and assembly techniques.

Materials: Wooden boards (cedar or similar), wood screws, wood glue, sandpaper, wood stain or paint.

Process: Cut the wood according to a pre-designed plan or blueprint. Utilize techniques like rabbet joints or dadoes to create strong and stable connections between the pieces. Assemble the birdhouse, ensuring proper alignment and secure fastening. Sand the surface and apply a protective finish.

Crafting a Wooden Cutting Board

Objective: Creating a functional and visually appealing cutting board using advanced joinery techniques.

Materials: Hardwoods such as maple or cherry, mineral oil or butcher block oil, food-safe finish (optional), woodworking tools (hand planes, chisels, etc.).

Process: This project typically involves choosing and preparing the wood, accurately cutting the pieces to size, and employing joinery techniques such as miter joints or tongue-and-groove joints to assemble the board. Finishing requires sanding to a smooth surface and applying a food-safe oil or finish to protect the wood and maintain its integrity for years of use.

Constructing a Small Wooden Box

Objective: Building a small wooden box with a hinged lid, incorporating advanced joinery and finishing techniques.

Materials: Hardwood of choice, hinges, wood glue, sandpaper, wood finish, small brass or wooden latches (optional).

Process: This project involves precise cutting and fitting of the box sides, bottom, and lid. Various joinery techniques such as miter joints, rabbet joints, or dovetail joints can be utilized, each offering a unique aesthetic and structural strength. Proper alignment and precise fitting are crucial for a well-functioning box. Adding hinges and latches enhances both functionality and visual appeal.

Advanced Woodworking Projects: Mastering Craftsmanship

Advanced projects demand a high level of skill, precision, and creative vision. These undertakings allow for the exploration of complex designs, intricate joinery, and refined finishing techniques.

Building a Shaker-Style Chair

Objective: Constructing a classic Shaker chair, requiring precise joinery and a keen eye for detail.

Materials: Hardwood lumber (e.g., maple, beech), wood screws, wood glue, sandpaper, wood finish, traditional woodworking tools (hand planes, chisels, etc.).

Process: This project necessitates a comprehensive understanding of woodworking fundamentals and advanced joinery. Shaker chairs are known for their simple elegance and precise construction. Techniques such as mortise and tenon, dovetail, and wedged joints will be employed to create a strong and durable chair.

Creating a Custom-Designed Coffee Table

Objective: Designing and building a unique coffee table reflecting personal style and woodworking skills.

Materials: Hardwood lumber, woodworking hardware (e.g., drawer slides, casters), wood glue, wood finish, design sketches and plans.

Process: This project involves the entire woodworking process, from initial design and plan creation to material selection, cutting, joinery, assembly, and finishing. Complex joinery techniques, advanced woodworking tools, and meticulous attention to detail are crucial for creating a high-quality custom coffee table.

Constructing a Detailed Wooden Toy

Objective: Building a complex wooden toy, demonstrating advanced woodworking skills and attention to detail.

Materials: High-quality hardwood, non-toxic finishes, small hardware (if required), woodworking tools, detailed plans.

Process: This project showcases advanced woodworking skills and the ability to work with smaller, more intricate pieces. Precise cuts, careful assembly, and a smooth, child-safe finish are essential. The specific design can be tailored to suit personal creativity, from intricately carved wooden animals to complex puzzles.

In conclusion, the world of woodworking offers a diverse spectrum of projects suitable for all skill levels. By progressively tackling projects of increasing complexity, woodworking enthusiasts can continuously refine their skills, expand their creative potential, and ultimately derive immense satisfaction from creating beautiful and functional pieces that will endure for years to come. The key is to start with simpler projects, gradually building confidence and technical expertise to tackle more ambitious endeavors. Remember to prioritize safety and always adhere to proper woodworking techniques.

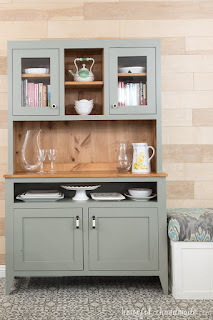
Crafting an Elegant Buffet: Woodworking Plans for the Dining Room

Transform your dining room into a haven of sophistication with a handcrafted buffet. This isn't just about storage; it's about creating a statement piece, a focal point that reflects your personal style and enhances the overall ambiance. Forget mass-produced furniture; embrace the artistry of woodworking and build a buffet that speaks volumes about your appreciation for quality craftsmanship. These detailed woodworking plans will guide you through the process, step-by-step, ensuring a stunning result that you'll cherish for years to come.

Choosing the Right Wood and Design

The heart of any successful woodworking project lies in the selection of materials. Consider the overall aesthetic of your dining room. Rich, dark woods like mahogany or walnut create a dramatic, traditional feel, while lighter woods such as oak or maple offer a brighter, more contemporary vibe. Explore different wood grains and finishes to find the perfect match. Your design choice is equally important. Do you envision a sleek, minimalist buffet or a more ornate, traditional piece? Sketch out your ideas, noting dimensions and features. Consider incorporating intricate carvings, stylish hardware, or unique leg designs to personalize your buffet.

Essential Considerations for Wood Selection

  • Budget: Different wood types have varying price points.
  • Durability: Hardwoods offer superior durability and resistance to scratches.
  • Aesthetic appeal: Choose a wood grain and color that complements your existing décor.
  • Workability: Some woods are easier to work with than others, especially for beginners.

Detailed Step-by-Step Construction

Once you've finalized your design and chosen your wood, the construction process begins. These plans provide precise measurements and detailed instructions for each stage. Begin by carefully cutting all the pieces according to the plans. Precise cuts are paramount for a flawless finish. Next, assemble the frame, ensuring all joints are tight and secure. Use quality wood glue and clamps to ensure a strong bond. Once the frame is complete, add the shelves and drawers. Pay close attention to drawer slides and hardware placement for smooth operation. Sanding is crucial; meticulous sanding ensures a smooth, even surface for staining or painting.

Key Steps to Ensure Success

  • Accurate Measurements: Double-check all measurements before cutting.
  • Proper Joint Construction: Utilize appropriate joinery techniques for strength and stability.
  • Meticulous Sanding: Achieve a smooth surface for a professional finish.
  • Finishing Touches: Carefully apply stain, paint, or varnish for protection and aesthetic enhancement.

Adding the Finishing Touches

The final stage transforms your functional buffet into a true masterpiece. Apply your chosen finish—whether it's a rich stain, a vibrant paint color, or a protective varnish—paying attention to detail. Let the finish cure completely before adding hardware. Choose handles and knobs that complement your design and enhance the overall aesthetic. Consider adding subtle details like decorative molding or inlay work for an extra touch of elegance. Once completed, admire your creation. You've successfully built a stunning buffet that will be the centerpiece of your dining room for years to come, a testament to your woodworking skills and design flair.